Wednesday, December 14, 2011

Little Gift Box


This thing is tiny.  It could hold a little gift like jewelry.

I used the Wrap it Up Cricut Cartridge to cut it out.

To make the snowflake stand out I used some Stickles in Waterfall.  I LOVE the look of colored Stickles on white paper like that to create another color without having to add another layer of paper.

For the sides I started off using a border punch by Martha Stewart called Doily Lace on some shimmery blue cardstock.  Then I wrapped it around the box.

I used some pink ribbon that has a cool crinkled texture over the blue cardstock.

On top of that I added some lavender ribbon with little snowflakes on it.

I'm really happy with how this came out and it was pretty quick to put together.  The downside is after I did all this to the box I realized I made it pretty stinkin hard to open!  *LOL*  I will manage to slip a gift inside it, but it may get ruined the second the person opens it.  

Hugs to all! I miss everyone!  I haven't been checking out my favorite blogs lately and I'd love to catch up with ya'll soon :) 

Monday, December 12, 2011

Baby It's Cold Outside


For this card I used:

Cricut Cartridge Winter Frolic.

Peachy Keen stamp set Wide Eyed Kids.

Pink by Design stamp from Christmas Wishes.  Stamped in Versamark and embossed with white embossing powder.

Felt Snowflake from Stampin' Up.
 
White gel pen by Sakura Gelly Roll.
Mirrored gems are from the Irock.

Stickles in Silver (on Skates) and Icicle - on Pom Pom.  Before adding the Icicle Stickles to the hat I added some Ranger Liquid Pearls in White Opal to cover the green paper since I wanted it to be white on top.

I used some Stampin' Up markers to add a little detail to the hair and some color for the mouth.

Thursday, December 8, 2011

Embossed Tree Card


Kraft colored card base.

Tree stamps from SP & Company's Ornamental Trees.  The trunk was stamped with Stampin' Up's Close to Cocoa. The green part was stamped with Versamark and then I added Stamp n' Stuff Embossing Powder in Green Tinsel, it's from Stampendous.

The sentiment is from SP & Company's Ultimate Sentiments 1 and it's stamped in Real Red by Stampin' Up.

The red ribbon was given to me by a friend :)  I put a notch in the top of the card so that the ribbon could slip through and I could tie it like a gift.


Monday, December 5, 2011

Snowflake Boxes


These little snowflake boxes were made to hold some small glass ornaments.

I used plain white cardstock that was 8 and 1/2 by 11 inches.

I used my Cricut and the Wrap it Up cartridge.  I used the fit to page feature and it told me it could cut the boxes at 8 inches, so that's the size I used.  Each side is around 2 and 1/4 inches.

Before I assembled the boxes I started off with stamping.  I grabbed my Stampin' Up Bordering Blue ink.  I used the SP & Company set called Falling Snow to put snowflakes on all sides of the box, EXCEPT the lid.  For this particular box the lid and bottom looked exactly the same, so I pretty much got to decide which one to use as the top.

After the snowflakes were all stamped I started using my ink blending tool to rub ink all over the box.  I did the lid too for that part.  Even though I used the same ink color as I did to stamp the snowflakes it worked perfectly because the blending creates a much lighter effect than direct stamping.

After the stamping and blending was done I created score lines and folded the boxes.  I did a bit more inking on the parts where the box folds to give a bit more definition.

I finished off the tops of the boxes with a couple layers of felt snowflakes and a little bit of Icicle colored Stickles.

Wednesday, November 30, 2011

Tis The Season Card


I wanted something clean and simple.

I started off with the standard A2 size card base in Kraft and rounded all the corners on a 1/2 inch setting on my Corner Chomper.

I used a Hampton Art stamp.  I stamped this neat image with snowflakes and the saying "tis the season" using some Versamark ink.  Then I covered it with white embossing powder and heat set it.  

I accented the centers of the snowflakes with some light blue bling.

I added some white stitching lines with my Sakura Gelly Roll pen around the image and the edges of the card.  

I tied some pretty sheer lavender ribbon in a bow.

Seems all my cards lately have been the quick and simple kind!  *LOL* I'm just itching to have some time to play around and do something a bit more elaborate... if I ever catch up on my housework. ;)

Monday, November 21, 2011

Believe In Magic Snowflake Card


Happy Monday everyone :)

Nothing says winter like snowflakes!  I cut this one from the Winter Lace Cricut Cartridge at 4 inches.  After cutting it in plain white cardstock I used the Ranger Inkssentials Ink Blending Tool and some Bordering Blue ink from Stampin' Up to give it hints of color.  Then I spritzed it with some Marshmallow Glimmer Mist.  After that I took out my I Rock and added a bunch of sparkling gems to it.  For the finishing touch I used some Ranger Liquid Pearls.

After going to all that trouble on the snowflake I didn't want to do too much to the card to take away from it, but it looked strange against too plain a background.  I made my card base Kraft colored.  I rounded the top 2 corners of my card using the 1/2 inch setting on my Corner Chomper.

I used the same Bordering Blue ink to stamp a background using the SP & Company Scripty Scripts set.  Then I added some color to the edges using the ink blending tool.

I added some retired Stampin Up ribbon, it is velvety.

I stamped "Believe in Magic" at the bottom of the card using SP & Company's Falling Snow set.

I'm really happy with the way this came out.  I spent a long time on the snowflake, but it looks exactly the way I wanted it to.  It came out a lot more masculine than I expected for something with so much bling and glitter.  *LOL*  I've just got to keep at it so I have enough cards to send the family for the holiday season.

Thursday, November 17, 2011

Thanksgiving Favor Box


Another quick project to share with you.

My sweet friend Amanda from Amanda's Crafts and More is doing a series called Thoughtful Thursdays and she asked if I'd share a project :)  So, this is on her blog today.  If you've never visited her before please take a moment to do so.  I promise you'll be glad you did.  I really admire her work and have LOTS of her projects on my Pinterest page.

Today I created a quick and easy project that would be easy to make lots of.  I think one of these on each plate at the Thanksgiving table would be adorable.

I took Stampin' Up's Pillow Box die and some cardstock from the DCWV Autumn Splendor Stack to create the box.

For the tag I took Stampin' Up's Vintage Labels.  I used their colors Really Rust and Ruby Red to stamp.  I ended up cutting the label out by hand, but I know it coordinates with their oval punch.

The little leaf charm is a Shrinky Dink.  It is made from an EK Success Punch.  I used some Bright White Shrinky Dink film.  I actually prefer the Rough and Ready kind for most projects because I find the Bright White gets streaky easily.  For this project I figured streaks would look lovely in my leaves so I pulled this kind out.  I colored the leaf with a Copic Marker and then punched a large hole with the bigger hole punch setting on my Crop a Dile.  Then I baked it to shrink it.

I attached the charm with a thin red ribbon that I tied into a bow.

Super easy and festive!  I could easily see making a bunch of these.

Thanks for dropping by :)

Wednesday, November 16, 2011

You're Too Kind Glamorous Card


I wanted something glamorous and sparkly to say a very special thank you to a dear friend of mine.
Here's the supplies I used.
Patterned paper from Echo Park's Be Mine Collection.

Corner Chomper on a 1/2 inch setting.
Diamond Stickles.
Black Diamond Stickles.

I Rock bling.

Eyelet Lace border punch from Stampin' Up.
Sentiment from Stampin' Up's Whimsical Words.  Its on die cuts from Nestabilities Labels 1. 

Image from The Greeting Farm, she is called Cheeky Glamour.

Copic Markers.
Oval and Scalloped Oval Nestabilities.

I spent a long time coloring and cutting my image, and then added some Diamond Stickles to the centers of her eyes, her eyeshadow, her boa, and the heart on her mirror.  I wanted it to look like she was sitting on the punched border piece, so I cut the oval Nestabilities a bit to make that look work.

It's got a lot of sparkle in person. 

Yay for playing with my new Copics.  I only had really cheap white paper on hand, so I don't think that helped with attempting to blend - but since I have no idea what I'm doing anyways I doubt it mattered much ;)  *LOL*


Thursday, November 10, 2011

Season of Freezin


Here's another card.  I think I am going to start calling these "stash busters" since this came about from trying to use up old supplies in my stash.

The penguin, paper, and tag are all from a 3 Birds kit from HSN.  
 
The penguin was pretty plain, but I found by adding googly eyes, Yellow Stickles to the beak, and Diamond Stickles to the blades of the skates it gave him a little life.  He's up on pop dots.
 
For the tag I went around the edges with some Diamond Stickles. Then I tied some sheer purple ribbon and adhered this straight down to the card.

I rounded the corners of the card base and layer on a 1/4 inch setting on my Corner Chomper.

In the corners I used some gems from my I Rock.  Placing the biggest one right in the corner, and stepping down 2 sizes to get smaller.

I really want to widdle down my stash.  I just have too much stuff in this room.  If I can de-stash and get all my holiday cards made at the same time I will be a happy camper :)


Tuesday, November 8, 2011

Simple Penguin Card


I wanted to use some of the cute holiday papers I've had for since last year and the year before.  So I grabbed a stack called Peppermint Forrest that came out at Joanns - I think last year.  I really loved this paper that has tons of cute penguins, snowmen, and polar bears on it.

So, I decided to make one of the penguins the focal point.  I just cut him out with an oval shaped Nestability.  I layered him on top of a scalloped oval Nestability cut in a sparkly red paper.

He's up on pop dots for a little dimension.

The snowflake paper is from the same stack.  Cut at 4 inches by 5 and 1/4 inches and then all the corners are rounded on a 1/4 inch setting.

The card base is black, with the same 1/4 inch rounded corners and lots of white gel pen stitching.

Along the bottom of the card I added a strip of white cardstock that had been punched with the Martha Stewart Icicle border punch.  I covered the icicles with Stickles and then added a sheer purple ribbon.
 
I think I may try cutting more things out of my patterned paper this way.  Faster than stamping or die cutting the main image, and way cheaper than purchasing a pre-made sticker or die cut.  Another option at least.  I love purchasing huge paper stacks, and sometimes it's hard to use them all up - so now I have one more way to try and use some of them up.


Friday, November 4, 2011

Starting To Think About the Holidays

While searching for inspiration for this year's holiday season I decided to go through some of my creations from last year to get inspiration.  Below each photo is a link to the original blog post that you can click for more details.


Photo doesn't do this justice, but there is a detailed video to give you a much better idea.


I hope that you find these inspiring!  I am having precious little time in my craft room these days and looking at these past holiday projects sure reminded me that I need to get a move on because the holidays will be here in the blink of an eye.

Monday, October 31, 2011

My Husband's Halloween Projects


Today I present you with a couple of projects made by my wonderful husband.  Typically we joke that I make pretty things that serve no functional purpose, and he makes functional things that are often hideous ;)  Of course there are exceptions to this.

We had a carving kit from last year with patterns in it and he and our little girl liked this cat, so he carved it last night.  I'm impressed, that type of thing is not an area of skill for me.  We have an led light inside that changes colors.

Click on the photo to see it bigger.
Here are the cookie houses he decorated.  He found this kit one day at the grocery store and thought it looked pretty cool.  For the most part he copied the box.  The kids got to put the candy on top.  I was very impressed with how well he used the frosting, so I told him he is helping make the next birthday cake!  To be honest I think he is a lot more naturally gifted in this area than I am.

So, between my decorations and his we have a pretty awesome dining room for Halloween :)

Here's a quick photo of my set up if you haven't seen it yet.

Click on the photo to see it bigger.
I put together the house and decorated the wine bottles.

Have a happy, safe, and spooky Halloween from the Holders :)

Thursday, October 27, 2011

The Costumes I Made


Here's my little carton of milk and cookie for Halloween.

Unfortunately the cookie costume doesn't look very round when he wears it, but at least it is ultra comfortable b/c he is picky that way.  I hot glued the chocolate chips on.  I added pipe cleaners in the seams of all the edges that were open - arms, legs, and head.  Then I sewed the other sides together.  It looks round... until he puts it on!  *LOL*  At first I was actually pretty po'd but life goes on.  Live and learn.

My daughter's carton of milk came together really well.  Her hat is a spout.  It was very hard to get it to fold nicely - maybe it wasn't long enough.  I stapled it together on the backside and left the spout pushed out.  To keep it on her head is a strip of poster board that curves upward to fit the shape of her head.  Then I stapled elastic on for a strap.  The carton is super simple.  I used 2 pieces of poster board and folded them in 2 one big section, one medium section, and one small section (for gluing)  The straps are also posterboard just stapled on.  The word milk is from the Ashyln's Alphabet font by Cricut.  The cow is from the Create a Critter cartridge.

Not perfect, but original enough.  My daughter loves hers :)

Wednesday, October 26, 2011

Whimsical Wednesday Card


Happy Wednesday!

Today I have a fun little card to share with you.  I figured this would be fun to give someone with a nice mug and some apple cider or something else to relax and enjoy the crisp fall days with.

This is for the new challenge over at Whimsical Wednesday that starts today.  The lovely Cathryn came up with the challenge called Fall Cuties and you need to use an animal on your project.
 
I have a standard A2 sized card.

I got my adorable squirrel from Create a Critter and gave him some googly eyes.

I used some brown paper that reminded me of bark a little bit - seemed "woodsy" to me.

The gorgeous ribbon is Shabby Crinkled Ribbon from Prairie Bird Boutique.  This color was from the Little Boo set.  There are lots of gorgeous color combos to choose from.

The red paper sort of looks like leather or something.  Kind of a cool pattern.  I used my Stampin' Up Scallop Edge border punch along the bottom.

For the sentiment I used a stamp from Tanner, who calls himself Mr Cricut Crazy.  This is from his Summertime Fun set.  It is pretty cool for a young boy to have his own stamp line :)  They are top of the line quality too.  Be sure and visit his blog to see what he's been up to.

Make sure you check out Whimsical Wednesday today to see all the designer's sneak peeks and pay them a visit.  You can also enter your own project!  Super fun :)

Thursday, October 20, 2011

I Have a Post On Craft Junkie Too Today


My dear friend Tracy asked me to do a guest post on her Craft Junkie Too blog today :)  I shared my table of Halloween decorations and did a product review of a foam haunted house kit from Michael's.  If you want to read it check it out here.

Wednesday, October 19, 2011

Super Simple Scrappin'


Although I enjoy fussing over every detail with my cards I rarely do that on my scrapbook layouts.  Not sure why exactly.  Partly because the photos are the real star, partly because in a huge album of layouts I wonder how much one embellishment will stand out, partly because I get all frazzled and feel like I'll never have time to scrap all my photos if I spend too long on one layout.  *LOL*

So, today I present a super simple layout.  All the papers are from the DCWV Autumn Splendor stack that came out last year.

On the top of the layout I have strips that are 2 inches wide.  The paper has all kinds of words on it like "pumpkin picking" and "family outing" with lots of glitter.

Below that I have another strip that is 2 inches wide.  It's a brown gingham type paper.  I placed my title on it.  The title was cut from the Ashylyns Alphabet Cricut cartridge at 1.8 inches.  It's cut out of a polka dot paper.  The polka dots are teeny tiny, so they show up well on die cuts.

On the very bottom of the layout I have a strip that is 1 and 1/4 inches wide.  Yellow with some soft white flowers.

The main paper reminds me of growing grains or something.  I intend to lay 4 photos horizontally that measure 4 by 6.  They will cover both pages edge to edge to look like a continuous strip, to fit right in with the other long strips going across the pages.  When the photos are laid down there will be a bit of the "grain" paper showing on both the top and the bottom of the photos.

So easy, no stress!  By choosing all the papers from one stack and only die cutting a title I was able to whip this whole thing up from start to finish in about 15 minutes with no pre-planning whatsoever.  We are planning on going to a farm next weekend for fall festivities and I felt inspired to prepare a simple layout.

Tuesday, October 18, 2011

Pumpkin Trio Card


So quick and easy!

Standard A2 sized card base in black.

The purple layer is a cheapie paper I got form the $1 spot at Target last year.  It's cut to 4 by 5 and 1/4 inches.

Before attaching that purple layer I wrapped some Shabby Crinkled Ribbon from Prairie Bird Boutique around it and tied it in a bow.  This color is from the Little Boo set. 

Under the ribbon I added s trip of green spiderweb paper by Recollections that had been punched with the Stampin' Up Scallop Edge border punch.

At the bottom of the card I stamped "Have a Spook-tacular Day" from the Pink By Design set A Haunting We Will Go.  I embossed it using some black embossing powder so that it shows up enough on the patterned paper, plus it just looks cool like that :)

For the image on the card I took 3 pumpkin embellishments from a Jolee's Boutique pack and added them to some green spiderweb paper - same as on the bottom.  Then I added that layer to a black piece of cardstock.  The black layer is about 1 and 1/8 by 3 and 1/4, but I just eyeballed it when I was cutting.

I finished off by going around the edges with some Starry Night Stickles.

Monday, October 17, 2011

Altered Wine Bottles


These were a total blast to put together!

These bottles are all empty, so I got to recycle something, but you could also use full wine bottles and actually serve them at a party.

On all 3 bottles I used Shabby Crinkle Ribbon from Prairie Bird Boutique.  The colors I used were from the Little Boo bundle.  

Also on all 3 bottles I used stamps from Pink By Design's A Haunting We Will Go set.  From left to right they read "You're Boo-tiful" "You're Purr-fect" and "Eek" These are all stamped onto paper that was sprayed with some Deep Plum Glimmer Mist.

The last thing that was used on all 3 bottles were some awesome keys from Martha Stewart.  They are really lightweight unlike real metal keys, but they have awesome color to them and they look pretty real to me.  They are attached with some embroidery floss.

On the first bottle I have also used a charm at the top that was made with inkjet printable Shrinky Dink material.  I do not know where the image came from as this charm was a gift from a friend.  I used a paper from a Recollections paper stack from last year and some green ribbon from Michael's.

On the second bottle I used more paper from last year's Recollections paper stack.  This one has kitty cats that are actually flocked (fuzzy to the touch.)

On the third bottle I used some paper from Target's $1 spot from last year.  I cut a spider from the Doodlecharms Cricut Cartridge at 1.75 inches.  I gave him some blinged out eyes using my Irock and placed a black ribbon string under him that looks sort of like a string he is hanging from.

So glad I got these done!


Thursday, September 29, 2011

What I've Been Up To - Teaching My Kids!


Lots has been going on with me lately. It's been making it really hard to get projects up!

I have been doing preschool at home with my 3 year old daughter.  I am doing this 4 hours a day, 5 days a week.  She is learning a ton and doing very well, I include my 2 year old son in some of the activities when I can too.  Plus the usual cleaning, cooking, etc.  She is taking dance and will be starting gymnastics soon, hopefully next week if I get down there to get her registered.  I am also trying to practice my sewing and hoping to be making a couple Halloween costumes for my kids.


 On a sad note, my grandmother is in the hospital dying.  She fell, hit her head, and had bleeding on the brain.  They did surgery and had high hopes for recovery, but she isn't going to make it.  My father has been out there with her for 2 weeks.  She has lived a good life and all that, but it is still hard.  My grandfather will not be able to do much without her as he has a very bad back, so he will need to go live somewhere where he can be taken care of. That has been zapping my energy too.  It is hard to hear the sadness in my father's voice and not be able to be there with him right now.


So, long story short I am SLAMMED.  Lots of transitioning for me.  Trying to get into a good routine with the new things we have going on in our lives. I am answering e-mails more slowly and may not be posting too often for a couple weeks.


In this post I've added some pictures just to share.  I made a board with the day of the week, month, what we are doing for the day, etc.  I am going to start using this with the kids on Monday.  It should be fun.  Everything is laminated for durability.  Lots of pieces to change out store in an envelope on it.  Some things attach with magnets, velcro, etc.  It took me HOURS, it's exactly this kind of thing that has been making it hard to blog!  *LOL*  The other pics are the school area and the adorable kids learning and doing projects.

 
So, if you have trouble getting ahold of me, this is why.  I hope to be back at 100% and posting more frequently again in a couple weeks.  I am still around, but falling a little behind.  Just wanted to let everyone know.

Spending so much time each day focusing on projects and learning has been AMAZING!  By far the most rewarding feeling ever.  I don't always have "good mom" days or moments.  Sometimes I yell at my kids, or get upset that the house isn't perfect, etc.  I am really finding this time to focus on them and not think for a second about housework and such has been good for all 3 of us.  I just need to adjust to the amount of time it takes and get into a new routine.  Finding out what works and what doesn't for when to start, which activities to do, etc.

*Hugs to all*
 
I look forward to getting my creative mojo back!


Tuesday, September 27, 2011

Playing With Acetate


I just wanted to play around with some acetate and see what I could come up with.  I buy huge packs at my local office supply store.  They are a bit pricey, but last a looong time for projects.

I cut a window in a standard sized card base.  It was rather confusing for me, since I am NOT good at measurements!  *LOL*  

I have a top layer for the card that is cut at 4 by 5 and 1/4 with the same sized window cut in it.  The patterned paper is from the Basic Grey Kioshi 6 by 6 pad.  I tied a piece of green ribbon around this layer before adhering it.


In between those two layers is the piece of acetate.  This way the card looks clean both outside and inside and you can't see the adhesive on the acetate.

I stamped a bird cage from the My Cute Stamps Elegant Birds set using some Cotton White Staz On ink right onto the acetate.  For those of you that aren't familiar with Staz On it is designed for stamping on surfaces you can't use other inks on, just like this plastic sheet.

On the inside of the card is a tiny little bird from the same stamp set, also using a patterned sheet from the Kioshi collection.  I will write my sentiment towards the bottom on the inside so that it is hidden when the card is closed.  Easy enough.

Friday, September 23, 2011

Dance Lessons Layout


Happy Friday!

Just popping in to share this layout.

The title was cut from Shall We Dance at 3.5 inches  I used some Marshmallow Glimmer Mist for  a touch of sparkle.

The journaling shape was cut from Once Upon a Princess.  The smaller one is 3 inches.  The larger one behind it is 3.3 inches, BUT I messed with the width in my Gypsy to make it look like a shadow and I don't know the exact final size.  I used some Ranger Liquid Pearls in Petal Pink to create tiny little pearls all around the edges.

The adorable little dancer was cut from One Upon a Princess at 7 inches.  I had lots of fun embellishing her.  I used a Peachy Keen Princess face.  I chalked her cheeks.  I took the bows that were supposed to be for her hair and added them to her leotard.  I used some Magenta Stickles on her bows and tutu, and also used them to free hand design a little heart.  Her tights are sparkling with Marshmallow Glimmer Mist.

Wednesday, September 21, 2011

Happy Fall Ya'll Card


I've got another fall themed card today.

This is for the Whimsical Wednesday Challenge Fall Colors.  The prize this week is some awesome paints from Creative Inspirations so be sure to enter for your chance to win :)

The base of the card is a chocolate brown color.

I added a 4 by 5 and 1/4 inch layer of patterned paper from the Autumn Splendor DCWV stack.  It's got some really shiny gold accents.

The leaves are cut at 3.5 inches from the Creative Memories Cheerful Seasons Cricut Cartridge.  I inked around the edges of the leaves to give them a bit of depth, and added them to a kraft colored shadow.

I added some gorgeous Shabby Crinkled Ribbon from the Little Boo Collection.  It's from Prairie Bird Boutique.

For the finishing touch I hand cut a little banner in some cream colored cardstock and stamped "Happy Fall Ya'll" using a Pink By Design stamp from the Simply Everything.  I love hand making little banners for things these days.  I think I'm going a little overboard with that trend!  *LOL*

Make sure and head on over to Whimsical Wednesday to check out all the fabulous inspiration, and be sure to enter your own project for the chance to win some fabulous paint from Creative Inspirations

Monday, September 19, 2011

Fall Leaves Card


I wanted to whip up something that really had the spirit of fall in it.  

The card is a standard A2 sized base in Kraft color.
It has a layer of cream colored cardstock at 4 by 5 and 1/4.

I used a stamp set from Close to My Heart called Autumn Splendor for these beautiful leaves.  I used Stampin' Up ink colors: Creamy Caramel, Close to Cocoa, More Mustard, and Pumpkin Pie.

I used the Close to Cocoa marker to do some stitching lines all around the edges, and then added  a bit of light brown satin ribbon.  To make my knot a little prettier I actually added a separate piece in the center.  I folded a piece of the ribbon in half and used Scor Tape to secure it around the middle of the knot.

I thought about adding a sentiment, or something else, but in the end I decided to just show off how pretty the stamping is in all the lovely colors and I didn't want to cover it up or detract from it. 


Friday, September 16, 2011

Winner of the My Memories Software

As Friday comes to a close I've used Random.org to help me pick the winner of the give-away.  Congrats to littlen you left comment number 11 and you've won the software :)

Coffee Card w/ A Video


I wanted to play with the Cricut Lite cartridge Love You a Latte.  I stuck with mostly brown and vanilla shades with just a couple pops of pink for a fun and feminine touch.

Here's a quick supply list.

Cut from Love You a Latte at 3.5 inches

Inks:
Stampin' Up Creamy Caramel
Stampin' Up Close to Cocoa
ColorBox Fluid Chalk in Chesnut Roan

Stamps:
SP & Company Scripty Scripts
Stampin' Up Dot Dot Dot
The Paper Studio Coffee Cafe

Other:
EK Success Border Punch Open Scallop
Nestabilities in Circle and Lacey Circle
Twine from The Twinery in Cappuccino

To see me put the card together step by step with a few tips along the way check out the video below.


Thanks so much for visiting!  Happy Friday :)  I hope everyone has a fantastic weekend.

Thursday, September 15, 2011

Sewing a Zippered Pouch


I wanted to learn how to sew little lined zippered pouches.  I found this tutorial on You Tube and watched it to help me figure out how to make it.  It was a bit challenging for me to sew the zipper, but I managed.  You can easily make it any size you want.  I used an 8 and 1/2 by 11 sheet of paper for a template.  The finished size is 10 by 7 and 1/2.
 
 
I'm glad to be continuing my sewing journey and learning new skills.  I am so thankful for the people who make sewing tutorials on You Tube!!!


Wednesday, September 14, 2011

Working With My Memories Software


*Give Away Alert!!!*

I had a really fun opportunity to try this software called My Memories.  I'm going to share 3 projects I made using it, and a little bit about what I thought of the software.

The first thing about it that I liked is that it is both Mac and PC compatible, you just pick which version you want after you purchase it and download that one.  I run a Mac and it's working beautifully for me, so that's nice since a lot of scrapbooking software doesn't have that option.

My favorite feature is how easy and fun it is to make circular text!!!!  Some basic software programs don't have that awesome feature, and frankly things like Photoshop are over my head so I have a hard time learning to do things like that in that type of software.  This was perfect for me, very easy to do.

My Memories comes with all the basic shapes like scalloped squares, circles, etc.  You can easily fill any of these shapes with any color or patterned paper to make lots of fun layers and effects with minimal effort.

It includes lots of basic papers like polka dots, and some funky patterns too.  It also has some brads, buttons, flowers, etc.

I'm having a lot of fun playing with it!  

Here are the projects I made.

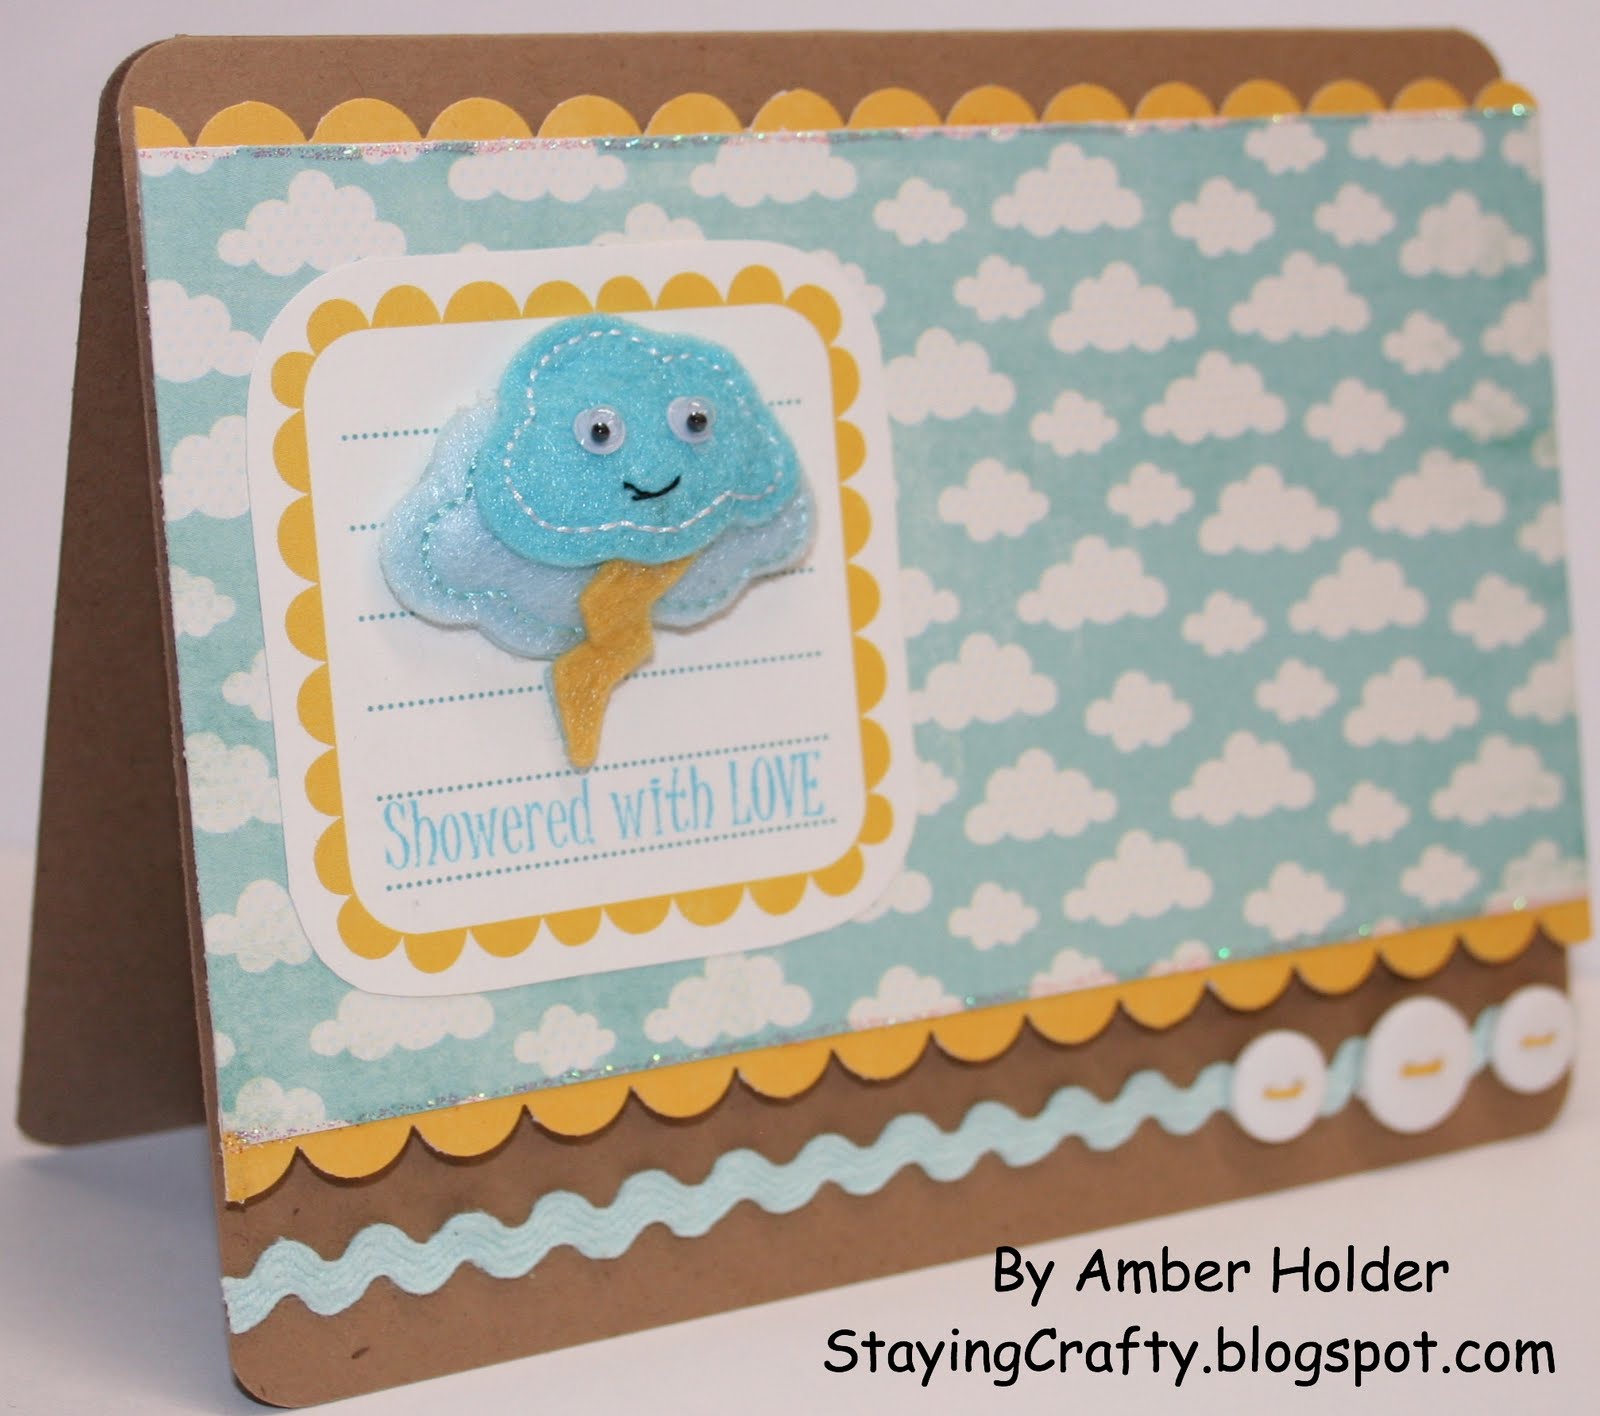
The first thing is a simple digital layout.  I figured I ought to try my hand at that.


Everything on this layout, except of course the photo was done using only things that came with the software.  I started off with a simple textured polka dot looking background.  The text along the top was super easy to curve, and I even grabbed a part of the flowers to color the words with to ensure they matched perfectly.  It was easy to line all those little rhinestones up in a row, as the software gives an option to copy and paste the item directly on top if itself and not off-set it.  This allowed me to just use the arrow keys to move them, ensuring they stayed in a straight line.

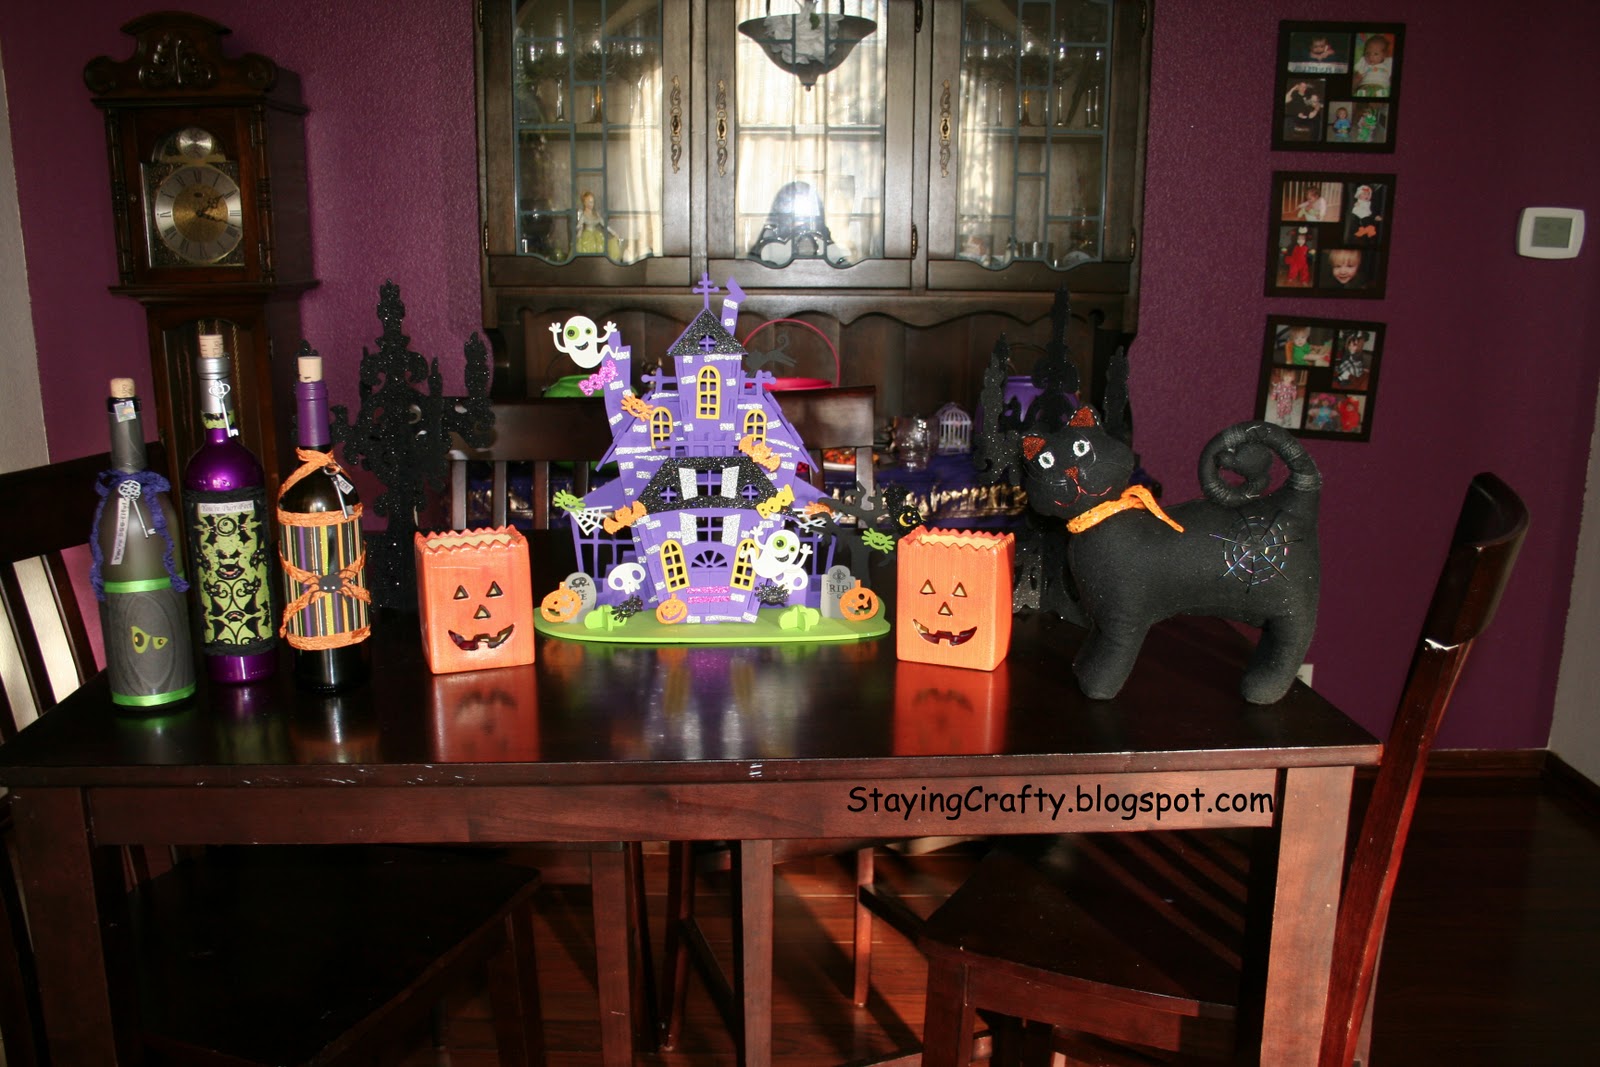
My next project shows how much fun the circular text can be.


The circle of black dots came with the software.  I simply added my text, chose the color, and told it I wanted it to be a circle.  Then I played with sizing a little bit until the spacing was perfect.  After printing out the design I cut the circle shape with my Nestabilities.  Then I inked the edges and added a pumpkin die cut from my Gypsy Wanderings Cricut cartridge.  I added it to a little straw.  These would be easy to mass produce as cupcake toppers or to stick in a tiny candy filled box or bag.

My last project is going to be framed, but I didn't want the glare of the glass so I snapped the photo of it plain.


The only thing I added that didn't come with the software is the photo of the ballet slippers.  I snagged that by doing an online search for ballet slippers.  Basically what I did is take advantage of the basic shapes.  They are easy to color and re-size so I created the look of lots of layers.  The scalloped rectangle was easily filled with a patterned paper that comes with the software.  The beautiful flourish was found in the embellishments.  The text was just a font I have on my computer sized and typed out.  Really, very quick.

So, I hope this gives you an idea of all the cool things this software can do, and it does come with a lot to get you started.  They also have a store where you can go purchase more goodies.

I am able to offer one of my readers a FREE copy of this software - downloadable version.  To be entered to win please leave a comment on this post with the following info.

1) Your favorite of my 3 projects today

2) Go to the My Memories website here and tell me one of the kits they offer that catches your eye and what you might use it for.

I will choose the winner on Friday to get their very own copy of this fun software to play with.

If you decide you'd like to buy the software for yourself please use the promo code STMMMS55623  

That code will get you $10 off the software, and also $10 to use in the store for kits.  The code is exclusive to me, so when you use it you are helping me out and I appreciate it.

Tuesday, September 13, 2011

Funny Kitchen Card


This card reads "Countless number of people have eaten in this kitchen and gone on to lead perfectly normal lives"  I have to admit, that does a pretty good job of cracking me up.

I used a stamp set called A Woman's Place by There She Goes Clear Stamps.

I stamped the appliances onto some mirrored cardstock using black Staz on ink.  I stamped the cabinets in dark brown onto kraft cardstock, and then filled in the handles with a silver gel pen.

I cut out and assembled all the pieces.  After that I just added a cute satin ribbon and stamped my sentiment.

I have no idea what I'm going to use this card for, but the idea is so cute that I just couldn't help but make it.

Friday, September 9, 2011

Showered With Love


Happy Friday!

I started off with a Kraft card base, and rounded the corners on a 1/4 inch setting on my Crop a Dile

The cloud paper is from the My Mind's Eye Lime Twise, Fly a Kite 6 by 6 pad.  It's cut at 3 inches by 5 and 1/2.  The top and bottom edges have a thin line of Crystal Stickles.  Behind it are some scallops punched with my EK Success Scallop Border Punch. This whole layer is up on pop dots.


The little journaling tag was cut from the Echo Park Little Boy collection.  I used a stamp that says "Showered with Love" from the Pink by Design Country Living set.  Then I added a KI Memories Puffy of a rain cloud.

Along the bottom I added some ric rac ribbon, and 3 white buttons that I threaded with thin slivers of cardstock to match the scallops I punched.

This card was very inspired by a beautiful rainy day we had this week.  It felt so good to cool off and for the air to be crisp and fresh instead of just feeling hot.  I think I kept it generic enough that it could be used for a simple thinking of you card.  Hope you like it :)

Wednesday, September 7, 2011

Just FYI Nestabilities Work Great on Construction Paper!


My 3 year old daughter put together these adorable frogs.

She is learning to cut with scissors and that means lots of projects with cutting and glueing.  

I had seen this cute kit 
I found it very inspiring for paper bag puppet ideas.  The kit makes it easy with lots of stickers that come with it, but I didn't want to order it.  Can't buy everything, right?!  

I knew my daughter would have a very hard time cutting nice circles.  Heck, I can't even cut a decent circle, so I decided to try my Nestabilities.

They worked BEAUTIFULLY on construction paper. I got gorgeous, clean cuts with it, and my daughter was able to stack the plates for the Cuttlebug, so all I did was turn the crank for her.  She loved it, and it was easy.

When you have kids construction paper is hard to work with.  You don't want to use it in your die cutting machine because it will mess up your mat, but even beyond that it tears easily and can bunch up and not cut well.  I even find it hard to use in my paper trimmer that has a sliding blade if I'm not very slow and careful about it.  So, I was thrilled to find out that this was super easy and effective and thought I'd pass along the tip.

She still got to use her scissors on this project, and then do the circles the easy way.  I'm sure we'll be using the Nestabilities again together.  Plus, she just thinks it's really cool to get to play with MY toys ;)  

Hugs to everyone.  I'm trying to keep up, but things have been nuts.  I am doing preschool at home and I spend many hours planning our lessons and doing them with her.  Then just the usual cleaning, cooking, laundry, etc.  I am just really focused on my kids at the moment.  It doesn't help I just un-mounted all my rubber stamps to convert them to cling and it took FOREVER and made a huge mess. *LOL*  Glad I did it, but that ate up a lot of would be crafting time too.
 
I have some fun projects in the works - so don't give up on me.  I've got some cool things planned for Halloween and such.  Coming soon, I promise.

I truly appreciate everyone that stops by!  Thanks for reading!

Monday, September 5, 2011

Discovery Bottles Layout


Here's a quick layout I whipped up.
 
It is of my daughter making discovery bottles.  Basically you get some bottles and let your kiddo put glitter, ribbon, sequins, etc. inside the bottle.  They the lid gets sealed on tightly and they get to see how all that stuff floats and moves around in the water.  Fun activity for kids around 2-3.  It is recommended to glue the lids on for kids under 3.

The paper is from DCWV.  I think it's from the Blossoms and Butterflies Stack.  I added some gems and lots of different colors of Stickles to the flowers.

There is one 4 by 6 photo, and two 4 by 4 photos. 

I used some cool stickers that are clear hearts with stuff floating inside.  I believe they are by Jolee's Boutique, but I no longer have the packaging to confirm that.  Thought they fit the theme perfectly.

Letter stickers are from the We R Memory Keepers Tiffany's stack.

Ribbon from my stash.

"Little Angel" sticker by 3 Birds from HSN.
 
Simple page.  Think it came out cute and fun. Trying little by little to catch up on my scrapbooking.


Wednesday, August 31, 2011

For Those of Us Without GPS and Smart Phones - Altered Notebooks


Hello Everyone!

Today I have a simple and fun little project I whipped up.  I purchased these cute little notebooks at a good price during a back to school sale.  I altered them using the We R Memory Keepers Tiffany's collection and some Hard Coat Mod Podge.  They are the perfect size to fit in my purse confortably and still be big enough to be very useful.

I don't have a smart phone or a gps, or a palm pilot, etc.  So, I do all my stuff the old fashioned way.  I thought it would be nice to have a notebook for directions.  There are some parks, friends houses, etc. that I have a general idea how to get to, but need reminders of some of the street names and such, so I thought I'd just put everything in this Directions Notebook.  

The other one is just for helping me make lists, which I am positively obsessed with.  It might also end up with to do lists at times, but Shopping List looked so cute on the front of it I decided to call it that, even though it might not always be accurate!  *LOL*

If you are cooler than me and have all that fun technology you can always alter these for your kids in school or something.  Actually, I think it could make kind of a funny gift to give a Directions Notepad with a map to someone who wants a GPS system, assuming they have a good sense of humor of course ;)  You could package it up in a box and write "Low Tech GPS" or "Poor Man's GPS" or something silly like that.